Setup
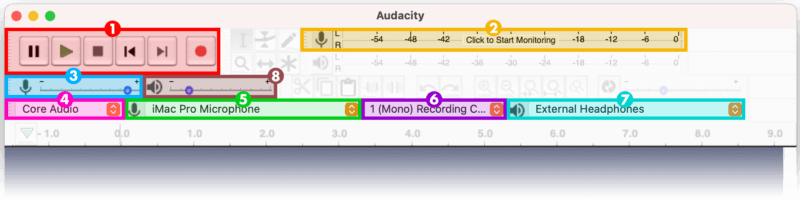
When you first open Audacity you’ll see a set of toolbars at the top. Note that they might not be in this exact order or location. (Note that these are screenshots from a Mac but everything will look more or less the same)
If you’re missing a toolbar or would like to customize which toolbars are visible, select ‘View > Toolbars’ and un/check from the menu as you like. You can also rearrange the toolbar order using the ‘grabber’ column at the left end of each, or resize a given toolbar using the ‘drag bar’ column at the right end.
The Device Toolbar
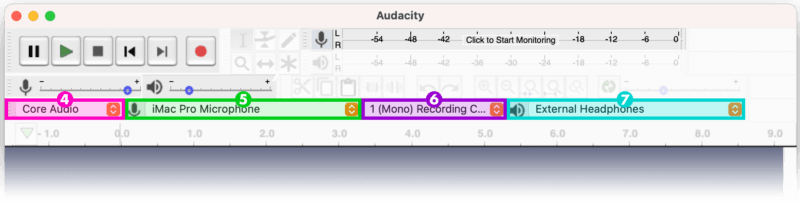
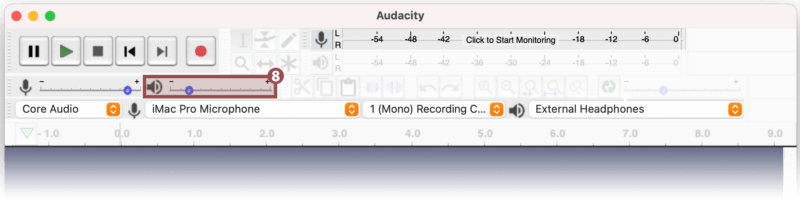
Next, you’ll see the Audacity device toolbar, where you can make routing selections from a handful of dropdown menus. From left to right, you can choose your audio host, recording device, recording channels, and playback device.
Audio Host
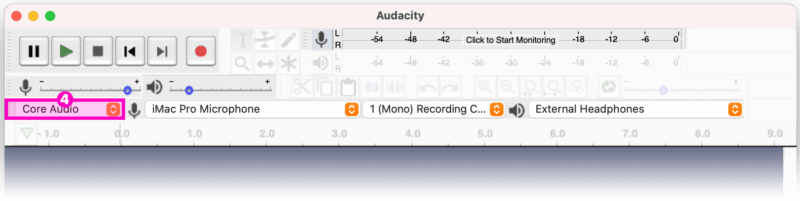
On Windows, there are a handful of options, but the default ‘MME’ is most compatible with all audio devices.
Recording Device
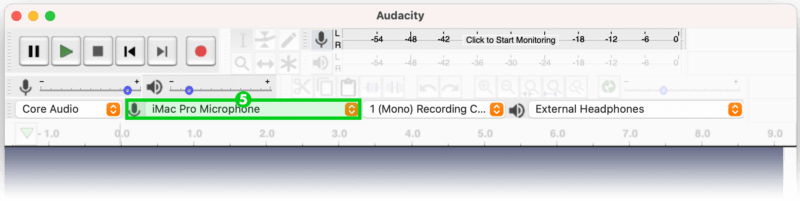
From the recording device menu, choose your connected USB mic. Usually the brand and/or make name will be listed such as ‘Logitech H390 Headset’ or ‘Microsoft Lifechat.’
If your mic is not available from the dropdown, a few troubleshooting steps include making sure your mic is plugged in and turned on and checking your computer system preferences to verify that your mic is connected and selected. If those steps check out, closing and restarting Audacity can sometimes jog its memory. You can also consult Audacity’s extensive manual for further help.
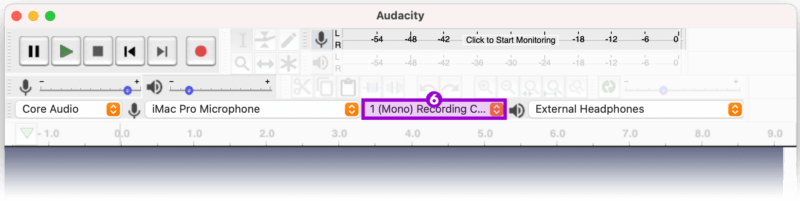
Recording Channels
Since you’re recording on one microphone, choose ‘1 (Mono) recording channel’ from the recording channels dropdown.
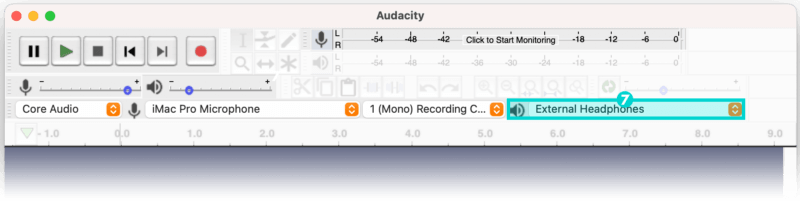
Playback Device
This is where you tell Audacity what device you are using to listen during the record. If you are using a USB headset then you’ll choose the same device as you did for the input device (because a headset is both the mic and the headphones). Likewise if you are using a mic and your headphone is plugged into the mic itself, then you’ll choose the same device as you did for the input device. If you are using a mic but your headphones are plugged into the headphone jack on your computer look for something generic and boring like ‘speaker/headphones’ or ‘external headphones’.
Test Your Input
Having a good microphone level or ‘setting levels’ is an important task before we record.
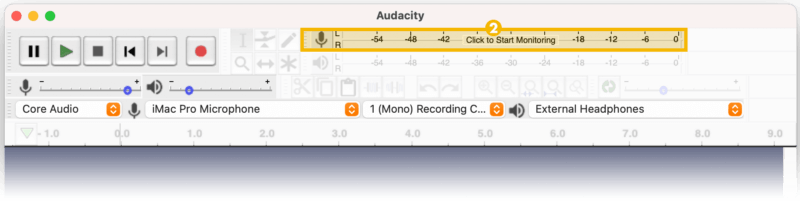
Microphone Level Meter
Reference the microphone meter and, if necessary, select the ‘Click to Start Monitoring’ button. When you talk into your mic, the meter will measure and display the volume your voice in decibels.
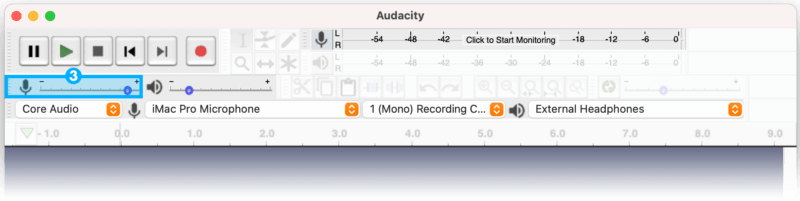
Microphone Input Level
With the meter engaged, begin speaking at a comfortable level and increase or decrease the microphone input slider so that it registers peaks (loudest parts) around -12dB. Remember to speak at your normal, I’m-on-TGAPCQS voice, not your telling-secrets-to-my-cat voice.
Tweak Your Output
This step is REALLY important and we cannot stress that enough. The #1 problem we have is contestants listening at too high a volume. When other people talk or a sound effect is used and your output volume is too high, all that audio will get picked up by YOUR mic and that’s called ‘audio bleed’ and it’s bad news and creates tons of editing headaches and generally a shitty sounding episode.
So will we ask you (pre-show) to listen to everyone talk and keep lowering your volume until you can’t make things out anymore then just nudge it back up to that lowest workable level.
Once again for the people in the back: it is NOT the volume you’d LIKE to listen at — it’s the LOWEST POSSIBLE VOLUME you can operate at. Be prepared to hear Dave tell you this 20 times during pre-show.
PLEASE DON’T THINK YOU CAN GET AWAY WITH A HIGH VOLUME! I WILL FIND YOU AND DESTROY YOU.
Playback Level
Ok! So how do you test and tweak your output volume? In Audacity, it’s the Playback Level slider with the speaker icon.
Zoom Audio Settings
The settings in Zoom do not affect your recording levels but they do affect how everyone else hears you while recording so we’ll adjust a few things with that in mind.
Speaker Settings
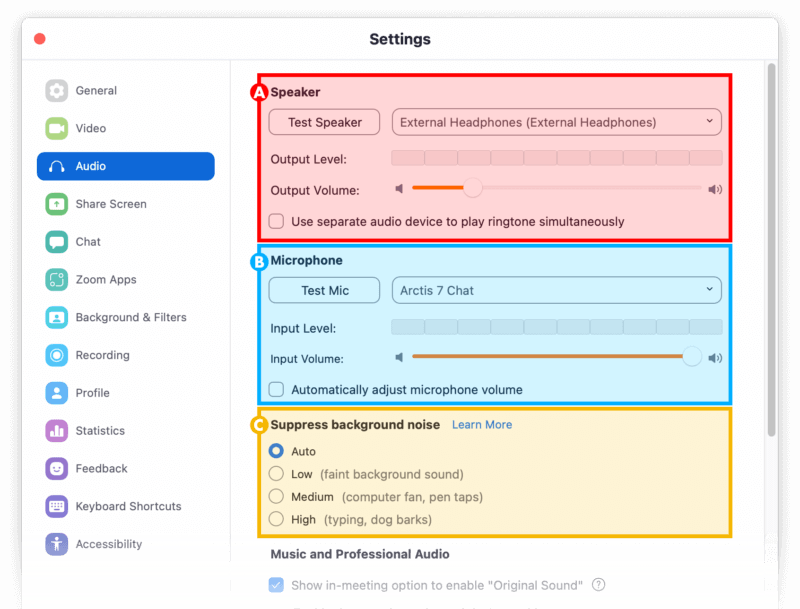
This should be set to whatever you are listening with. See Playback Device above for more info, same principles apply.
Microphone Settings
From microphone dropdown, choose your connected USB mic. Usually the brand and/or make name will be listed such as ‘Logitech H390 Headset’ or ‘Microsoft Lifechat.’ When you talk you should see the Input Level meter move with your voice. You can also test your mic with the Test Mic button.
You shouldn’t have to adjust the Input Volume slider because we set the mic’s input level in Audacity already.
Also UNCHECK ‘Automatically adjust microphone volume’ for the record (we recommend it for recording so we get a truer sense of what your recording is going to sound like but you should check it again once you are doing your normal Zooming).
Background Noise Settings
You can set this to Auto.

Recording
Press the red record button in Audacity’s transport toolbar (or keyboard shortcut ‘R’) to begin your audio recording. When Dave tells you to stop your recording at the end of the episode, hit ‘space’.
Save, Export & Upload
The last step of the process is getting your file to Dave. We’ll save the Audacity project, export your audio to a WAV file then send it to Dave. This will happen with you are still on the call with us so Dave will walk you through it but this is the process.
Save Project
Save your Audacity project by going to ‘File > Save Project > Save Project’. The project is all the settings, tracks and raw data that goes into Audacity for the recording. Save it to your computer in a location you’ll remember. You will not be sending us this project file but keep it around until your episode goes live for our peace of mind.
Export As WAV
Now we will create the file you will send to us. Go to ‘File > Export > Export as WAV’ and save it to your computer in a location you’ll remember. You may get a dialog box for ‘Edit Metadata Tags’ pop up after you click ‘save.’ Just click ok, you don’t need to do anything with the metadata. You may also get an alert about tracks being ‘mixed down’ but again, don’t sweat it and just click through it.
Upload For Dave
The last step is to send Dave your file. This file will be big so can’t just send it as a normal attachment in email. One of these methods will do the trick:
- Send it via Gmail and Gmail will detect the file is huge and put the file in your Google Drive and put add a link to it in your email.
- Put it on your file transfer/storage service like Dropbox, WeTransfer, Microsoft OneDrive or Box and send Dave the URL to download.
The email to send your file or URL to is david@cole.fyi